
Installing an air induction kit is quick and easy
Thankfully, installing an air induction system is an incredibly easy process that can be accomplished by even the most wrench-shy amateur in mere minutes. You’ll need a flat head screwdriver, a Phillips screwdriver, a socket wrench and a couple of socket pieces (sizes depending upon the bolt heads in your vehicle).
Step-by-Step Guide to Installing an Air Induction Kit
1. As always when you’re working on your vehicle you should disconnect the negative cable from the battery.
2. Unclip the mass air sensor’s electrical connector.
3. Disconnect the crankcase breather hose and remove.
4. Unclip the airbox cover and remove.
5. Remove the air filter and undo the airbox screws/bolts attaching it to the chassis.
6. Undo the air intake tube’s hose clamp on the throttle body.
7. Remove the airbox and intake tube assembly.
8. Remove the mass air sensor from the old assembly and install it on the new air induction system.
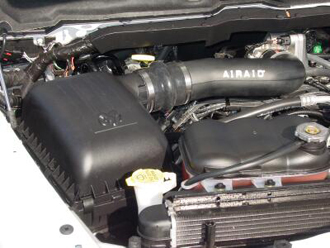
Once installed your new air intake kit will look something like this
9. Put the new silicone hose onto the throttle body and tightly secure with a hose clamp. Add the second hose clamp but don’t tighten it yet.
10. Attach the heat shield or new airbox housing to the engine bay.
11. Slide the new air intake tube into the silicone hose and secure with the second hose clamp.
12. Attach the air filter to the air intake tube with a hose clamp (if not already attached).
13. Reattach the mass air sensor.
14. Reattach the crankcase breather tube.
15. Reattach the battery cable.
The whole process shouldn’t take more than 20 minutes from soup to nuts. Now all that remains is for you to turn the key and start enjoying increased power, a more responsive engine and better gas mileage. We offer information and more at 4WheelOnline.
By John Bone
Posted on August 26th, 2013